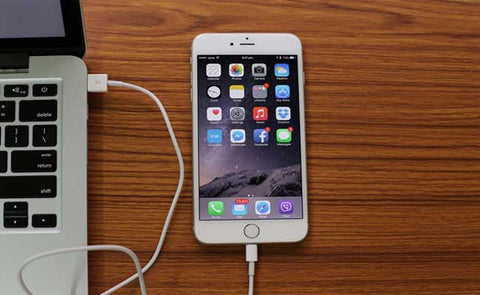
Your iPhone is at 10% battery, and you don't have a charger.
No big deal. Turn off the screen and it will last until you get home. You can survive without re-watching Kim Kardashian's Instagram reels for another hour, right?
You hit the button a hundred times. Nothing. You wonder "my iPhone won't turn off! Oh no!" and start to think you'll be paying an arm and a leg to get it fixed.
Deep breaths. Fixing it is easy, and with some tips and tricks along the way, you'll keep your iPhone in tip-top shape.
Thinking "My iPhone Won't Turn Off?"

Generally speaking, there are three causes as to why your screen has frozen or gone black.
- 1. A software issue
- 2. The screen isn't responding
- 3. Your power button isn't functioning correctly
If you're not tech-savvy, fear not. These are all easy fixes that anyone can do.
First Solution: Try to Restart
Attempt to turn off your iPhone the normal way by holding the power button until the "slide to power off" option appears. If this works then simply wait for your iPhone to power back on and see if the issue persists. If you're lucky, this will be a one-time error that won't repeat.
If you try to swipe and the screen doesn't respond, then try a hard restart. The steps are below and depend on your iPhone model.
iPhone Model 8 or Later, Including the Second-generation iPhone SE
- 1. Tap the volume up button.
- 2. Tap the volume down button.
-
3. Press the side button. Hold this until the Apple logo appears.
- 4. Wait for your iPhone to reboot and see if the problem persists.
iPhone 7 or iPhone 7 Plus
- 1. Find the side button and volume down buttons.
- 2. Hold both of these until the Apple logo appears.
iPhone 6S and All Earlier Models, Including the First Generation iPhone SE
- 1. Depending on your model, you may have a side button or top button.
- 2. Hold either one of these along with the home button.
- 3. Keep in mind that the normal power-off method is preferable. Do not resort to a hard restart if your screen is working.
-
4. In the event your iPhone does not turn on, make sure to plug it in to charge. Repeat the above steps. If this does not solve the problem, then please refer to this link.
Second Solution: Using AssistiveTouch to Replace a Malfunctioning Power Button
If your screen is still working, but the power button is not, then Apple has a convenient software button that you can use to temporarily or permanently replace a non-functioning power button. This is an accessibility feature for those who struggle to use physical switches.
- 1. Go to Settings
- 2. Go to Accessibility
- 3. Go to AssistiveTouch
- 4. Activate it with the toggle
If all goes well, you'll see a gray circle on your screen. Tap this and you'll have access to AssistiveTouch. From there, find the power off option.
Now you might be wondering, "How do I turn my iPhone back on if the power button isn't working in the first place?" Easy: plug it into your charger and the iPhone will start normally.
iPhone Gets Stuck While Restarting

Image credit: TechSpots
In the unlikely event that your iPhone turns on, but does not start up, (you may see a red screen, blue screen, or just the Apple logo) then you may need a few extra steps. You will need a computer to complete them.
Updating via Computer
- 1. Connect your iPhone to a PC/Mac.
- 2. If you are using a Mac, open the Finder. If you are using a PC, open iTunes.
-
3. If you are using iTunes, your iPhone should appear in the top left. If it does not, please follow this link for further instructions.
-
4. If you are using Finder, select the device on the left side panel. If you don't see your device, please follow this link for further instructions.
Depending on your iPhone model, do the following:
-
iPhone 8 or later, including second-generation iPhone SE: Tap the volume up button. Tap the volume down button. After that, hold the power button until you see the recovery screen.
-
iPhone 7, including iPhone 7 Plus: Hold both the power button and the volume down button.
-
iPhone 6s and all earlier generations, including first-generation iPhone SE: You may have either a side button or a top button. Hold one of these two buttons along with the home button.
Let go when you see the recovery-mode screen. You'll know you're there when you see the image of a laptop and a lightning cable.
The computer will give you two options: Update or Restore. Hit update.
Set your iPhone down and let the computer do the magic. It shouldn't take longer than 15 minutes, but if it does, your iPhone will exit recovery mode automatically. If this happens, repeat steps 3-8.
iPhone Isn’t Recognized by the Computer

Image credit: DriveTheLife.com
Take a few deep breaths and follow the steps at this link. This is usually not a serious issue, though it will require extra time "under the hood" to get the iPhone to talk to your computer.
Your iPhone Continues to Have Issues Turning Off
If you've tried everything above, there are still options. There might be a software or firmware issue that won't be fixed no matter how many soft resets or hard restarts you do. The next steps will require a computer.
Windows Steps
- 1. Connect your iPhone to your PC.
- 2. Open iTunes, and your device should pop up immediately. Before you do anything else, choose the Backup Now option. This will create a backup of your current iPhone configuration to your computer.
- 3. Once you've done that, select Restore Backup. There may be a list of previous backups, but here you're going to choose the most recent one that you made a few minutes ago. If you have a recent backup (such as from the day or week before) then select that one.
- 4. Complete the process. Be patient, as it may take some time before your iPhone is restored to its previous configuration.
- 5. Once the process completes, disconnect your device.
Macintosh Steps
- 1. Connect your iPhone to your Mac.
- 2. Open Finder, and select your device in the left-hand panel. Again, choose the Backup Now option.
- 3. Select Restore Backup. Choose the most recent backup that appears on the screen. If you have a recent backup from before this problem appeared, then select that one.
- 4. Mac will give you several steps of prompts to complete the process. Wait until your Mac tells you that the process is complete.
- 5. Upon completion, disconnect your device.
- 6. Now, test your power button. Does your device respond instantly and turn on and off as soon as you press the button? Lock and unlock your phone several times until the phone appears to be functioning normally.
If your phone now works flawlessly, congratulations. If it does not, hope is not lost. There is one final option where you can put your device into Device Firmware Update (DFU) mode.
Before a Deep Reset Using DFU Mode
There are a few caveats you should know before attempting a DFU-mode-style reset. This is not your average reset where the computer does troubleshooting to replace problematic code. DFU will completely wipe and restore every inch of code on your device, including the firmware.
Firmware is the bedrock of any device. This is the built-in programming that bridges the gap between the hardware of your device (the camera, screen, processor) and the software (iOS, your apps, etc.). As such, broken firmware is much more difficult to fix than broken software.
Think of firmware as the concrete foundation of a house. The house itself is built on top but can have significant portions changed or removed. Removing the foundation, though, would demolish every inch of the house in the process.
Before attempting the DFU mode reset, ask yourself if your iPhone is damaged in any way. Has it suffered a serious fall? Did you accidentally drop it in water once?
If there is a real possibility that the iPhone has suffered internal damage (even if it was working fine for you up until this point), contact Apple Support before making any costly decisions.
Performing the Deep Reset
You'll need a few things when performing a DFU reset.
- 1. An updated computer
- 2. A timer
These steps can be performed both on Mac and PC. Choose your iPhone model correctly before performing the steps.
iPhone 7 and Older Versions
- 1. Connect your device to a computer. If you're using a PC, you'll want to open iTunes. If you're using Mac, you'll want the Finder. Don't worry about whether your iPhone is on or off.
- 2. Hold the power button and home button. If you don't have a home button, hold the volume down button. Do this for 8 seconds and make sure your timer is ready.
- 3. Once 8 seconds have passed, release the button. Keep your finger down on the home button or volume down button. Do this until your iPhone appears in iTunes and/or Finder. You should get a system dialog that says, "iTunes has detected an iPhone in recovery mode. You must restore this iPhone before it can be used with iTunes."
- 4. Let go. If you've done this correctly, your screen should be black. If not, repeat the steps above until it is.
You should now be able to restore your iPhone from iTunes or Finder.
iPhone 8 or Newer Versions
- 1. Connect your device to a computer.
- 2. Tap the volume up button, then tap the volume down button. Do this quickly. Lastly, hold the power button until the screen goes black.
- 3. Don't let go yet! Now hold the volume down button. Make sure you get out your timer for this step!
- 4. Hold for 5 seconds total. You'll want to release the power button now, but continue holding the volume down button. Do this until your iPhone appears in the device list for iTunes and/or Finder.
- 5. Once you see your device in iTunes or Finder, you can let go of the volume button. If you see the Apple logo on your screen, that means you held the volume down button too long. Repeat the process from the beginning to give it another shot.
Your phone is now in DFU mode. Restore it as normal.
Final Note
If none of these steps worked, contact Apple support. Your phone may need a professional to look it over. Check your warranty for broken parts or the entire phone for free.
Prevent future issues with your iPhone by being prepared. Keep regular backups and install software that will make future restorations painless. And most importantly, keep your iPhone protected from unexpected drops and spills that might make future restorations more difficult.
Your iPhone Won't Connect to Wi-Fi

You've just fixed the broken power button. You open Instagram and the latest reels aren't loading.
Luckily, you won't need to connect your iPhone to a computer or do any messy resetting for this process. Network connectivity issues can have any number of causes, but it won't take more than a few short steps to sort them out.
Check if Your Router Is Working
Make sure it's plugged in and functioning correctly, and that the cables are in good condition. Contact your internet provider to ensure this isn't a problem on their end.
Make sure you're within the network range. Thick walls and other signal interference may cause slow network speeds, or prevent your iPhone from connecting at all. If you are in an upstairs bedroom or another location far from the router, you may need Wi-fi extenders or a second router.
It's Still Not Working
Go to Settings, then Wi-fi. Make sure the Wi-fi is on. Then check that your network has a blue checkmark, which means you're connected.
Make sure Auto Join is not disabled. This can be found under your network name.
If you are not connected, select your network and try to join again. Make sure the password you have is correct.
If you've tried all these steps, restart your iPhone and router. If you're still having trouble, head to your network settings on your Apple device. Resetting all Wi-fi networks, passwords, cellular settings, and VPN may solve these problems.
Not Enough Storage

Once your storage runs low, you may notice all kinds of errors.
Fortunately, there are several options to help you save on storage.
Using a Cleaner
During your everyday phone use, your iPhone slowly gets gummed up by digital clutter such as temporary files, picture duplicates, and leftover logs. As the days go by, this can build up until your iPhone suffers a noticeable performance impact.
Using a cleaner app can help to reduce that clutter in little ways. It may merge duplicate contacts, or suggest deleting accumulated GIFs and large video files. If you aren't backing up your phone regularly, this would be a good time to store away those larger files that aren't being frequently used.
Depending on when your iPhone was last cleaned, this could delete up to a gigabyte of junk files.
Using a Photo Compressor
When your iPhone takes a picture, it often does so in a raw format. These images include nitty-gritty details. It's not an issue when taking one or two pictures, but it adds up quickly.
Most people are not Photoshop aficionados who need raw images. If you only plan to keep the photos for memories and post them on social media, an image compressor can reduce the file size up to 90% without any visible quality loss.
Putting It in the Cloud
Cloud storage is all the rage these days, and for good reason: small devices with limited storage space can keep things online only, retrieving files when they need them.
iCloud is Apple's premium cloud storage service and integrates nicely with Mac and iPhone. You need not worry whether you've stored your best memories on your iPhone or your Mac, they'll be available on whatever Apple device you have at hand.
That said, there is an impressive lineup of alternatives if you're the sort of Apple user who'd rather not put too much trust in the ecosystem. And with that impressive new cloud storage, you might want an impressive phone case to match.
The Apple Watch

You've fixed your malfunctioning power button and misbehaving Wi-fi. You've expanded your storage space. Now, you're considering getting an Apple watch to complete the experience.
Everything looks good, except there's one issue: Apple offers two sizes of watches. A 44 mm watch, and a 40 mm watch. How do you pick which one?
40 mm Apple Watch
This is Apple's standard and most affordable watch. It features the smallest form factor and may be most suitable for those on a budget, or those who feel the larger 44 mm would be too large for their wrist.
This is the smallest screen size. It may be challenging to navigate with big fingers, or difficult to read for those with poor eyesight.
44 mm Apple Watch
At a higher price point, this Apple Watch uses the same internals as its smaller counterpart, while including larger screen real estate and a longer-lasting battery.
That means easier navigation for those with thicker fingers, easier reading, and much-improved battery life. This may feel big on smaller wrists and may be expensive for some.
The Verdict
If you don't want to strain your eyes and prefer the sort of all-day battery life that can keep up with your schedule, the 44 mm is the obvious choice.
If you're just looking to get your feet wet in the Apple ecosystem, the more affordable 40 mm is for you. Whichever one you choose, make sure to get a quality protective watch band to keep your new smartwatch looking pristine.
How to Unpair Your Apple Watch
If the issues with your iPhone persist, you may need to unpair it while resetting your device.
- 1. Make sure your Apple Watch and iPhone are next to each other
- 2. Navigate to the Apple Watch App on your iPhone
- 3. In the My Watch tab, select All Watches
- 4. Select the info button (stylized as "i") of the watch you wish to unpair
- 5. Unpair your watch
When you're ready to pair the Apple Watch again, simply press Start Pairing on the device to begin.
Get Your Devices Ready to Go Today

No matter what, this information should help you get your devices ready for use. No longer do you need to wonder if your iPhone and Apple watch are all set and ready to go!
Now, you need to ensure they are safe from harm or breakage. Take a look at our phone case collection next to get just what you need.


Leave a comment